
| P&W Service Center 18442 County Rd 731 Venus, FL 33960 |
Phone: 800-822-2180 (USA only) |
Fax: 941-360-2207 e-mail: sales@pwservice.com web: www.pwservice.com |
Hours: Weekdays 9:30AM - 4:30PM EST (Closed on major holidays) |
Add a Vibrator to your Minitor II pager $45
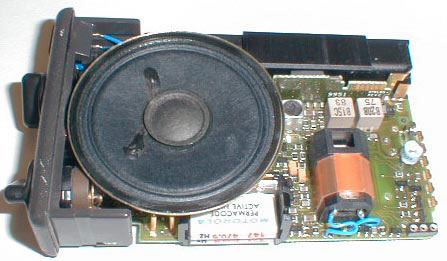
The picture above shows the vibe installed on a Minitor II pager. As you can see it attaches with two blue wires. The vibe is held in place by a black plastic holder which is surrounded by a noise reducing orange rubber.
***This can ONLY be used with a one channel pager, it will NOT fit into a two channel pager.***
How it works:
When installing the vibe you have three different ways for it to function (pick one):
C-1) Non Stored Voice - Your pager will be quiet in the Vibe position until you get a page then it will vibrate and do NOTHING else. If you want to hear the message you can hold down the reset button or switch the knob to the middle position. Once your message is over the pager will again be completely silent.
C-2) Stored Voice - Your pager will be quiet in the Vibe position until you get a page then it will vibrate and open up the audio until the stored voice has timed out. Once the stored voice has timed out it will again be silent until you get another page.
You may be wondering how we can sell a vibe for the Minitor II pagers when no Minitor II pagers ever came with a vibe from the factory. There was a pager called a Director II which uses a common board as the Minitor II pager. The Director II pagers came with Vibrators from the factory as a option. We modify the Minitor II board to accept this Vibe.
|
By making any modification to your pager you are
accepting complete responsibility for any damage or other problems
this modification may cause. Further you understand this is not a
factory option and not approved by Motorola.
Warning: We provide no technical support beyond this web page. If you attempt this procedure we will not assist you in any way, either on the phone or by e-mail. Proceed at your own risk! |
||
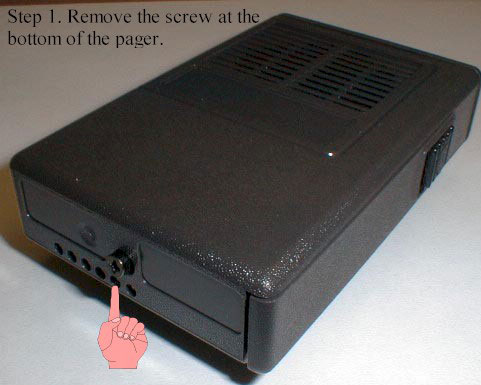
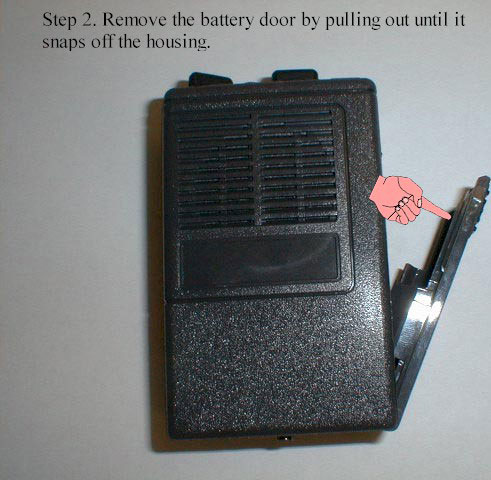
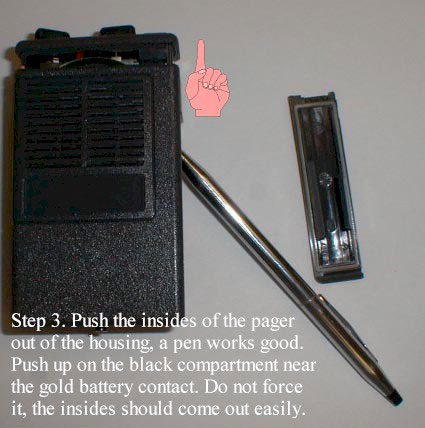
| To install the Vibrate feature you will need to chose one of the following setups A-B or C listed below. Next you will need to disassemble your pager. Once the pager has been disassembled remove the antenna to expose the bottom of the decoder board. You will see markings and little contact points. Find The jumpers listed below and either INSTALL (IN) or REMOVE (OUT) the jumper for your desired settings. When you put back on the receiver board you may need to hold it down while sliding the boards back into the housing. | ||
|
Jumper 3A4 - OUT 3A4 OUT 3B3 IN 3A3 OUT WIRE OUT |
A) Your pager will monitor the channel (pick up all the traffic) when in the Vibe position, alerting with a vibrate anytime you receive a page. Once your message is over it will revert to monitoring the channel again (this is sometime called open squelch) |
|
|
Jumper 3A4 OUT 3A4
OUT 3B3 IN 3A3 IN WIRE OUT |
B) Your pager will be quiet in the vibe position until you get a page then it will vibrate and open up the audio so you can hear the message. After the message ends it will then be in monitoring mode until you press the reset button. After pressing the reset your pager will again be quiet until you get another page. |
|
|
Jumper 3A4 OUT 3A4 OUT 3B3 IN 3A3 IN WIRE IN |
C-1) Non Stored Voice - Your pager will be quiet in the Vibe position until you get a page then it will vibrate and do NOTHING else. If you want to hear the message you can hold down the reset button or switch the knob to the middle position. Once your message is over the pager will again be completely silent. C-2) Stored Voice - Your pager will be quiet in the Vibe position until you get a page then it will vibrate and open up the audio until the stored voice has timed out. Once the stored voice has timed out it will again be silent until you get another page. |
|
 |
||
 |
||
 |
||
|
|
||
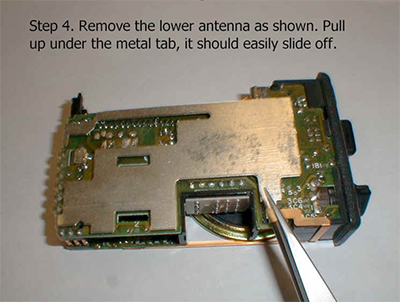
| Remove the antenna to expose the back of the decoder board. Install or remove the jumpers as required for the setups listed above (A-B-C). |
 |
|
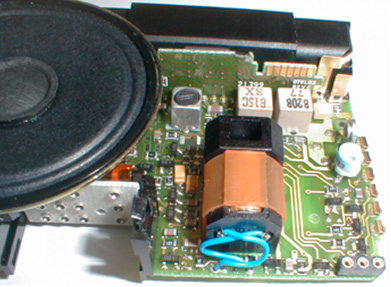
| Shown to the right is the location for the Vibe. It has 2 blue wires that go into the empty holes near the edge of the board. The vibe then snaps into place by pushing the plastic tabs through the two holes. It does not matter which blue wire goes into which hole. |
 |
|
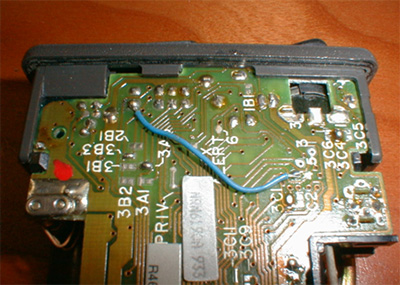
| The Non Stored Voice Minitor II is shown to the right but the stored voice version is the same. Jumpers 3B3 and 3A3 are shown with the jumpers in. The blue wire connects from the round silver hole directly above the #4 this goes to the switch near the top as shown. Jumper 3A4 is near the battery and needs to be out, this jumper often times is in from the factory so you will need to make sure its out. |
 |
|
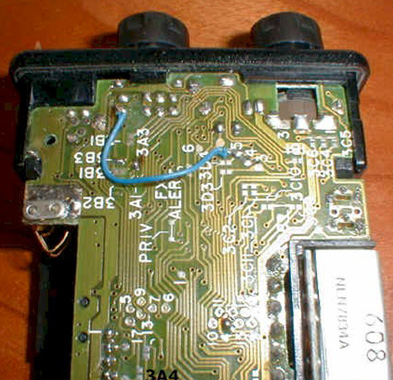
| On the stored voice Minitor II (show to the right) the jumper 3A4 is not marked on the board. Use the picture to identify 3A4 it is the jumper attached to the 4th pin down on the side connector. |
 |
|
| Warning: We provide no technical support beyond this web page. If you attempt this procedure we will not assist you in any way, either on the phone or by e-mail. Proceed at your own risk! | ||

Copyright © 1997-2024
Paging & Wireless Service Center. All rights reserved.
Legal Information
Last updated on
06/12/24.
